Difference between pages "File:Pf-art-recover.png" and "Pocket Fighter"
(File uploaded with MsUpload) |
|||
| Line 1: | Line 1: | ||
| − | File | + | <div style="display: flex; flex-wrap: wrap-reverse; flex-direction: row"> |
| + | <div style="display: flex; flex-direction: column; flex:9; padding: 1em"> | ||
| + | |||
| + | Pocket Fighter AKA Super Gem Fighter: Mini Mix | ||
| + | |||
| + | 1997 Capcom | ||
| + | |||
| + | Pages being reworked. Please check back later, or attempt to make sense of this mess. | ||
| + | |||
| + | = Competitive Footage = | ||
| + | |||
| + | <span class="outbound">[https://www.youtube.com/watch?v=676nBBttGDU Mar. 30, 2013 a-cho Pocket Fighter 1-on-1 Taikai]</span> | ||
| + | |||
| + | <span class="outbound">[https://www.youtube.com/watch?v=jlSQcFdD6qs Mar. 30, 2013 a-cho Pocket Fighter Casuals]</span> | ||
| + | |||
| + | <span class="outbound">[https://www.youtube.com/watch?v=JM5wu8OUg2o Nov. 24, 2020 Mikado Street Fighter Carnival 18 第21戦: Pocket Fighter]</span> | ||
| + | |||
| + | <span class="outbound">[https://www.youtube.com/watch?v=p0VGx16ogXo Nov. 25, 2020 Mikado Pocket Fighter Casuals]</span> | ||
| + | |||
| + | = Characters = | ||
| + | |||
| + | |||
| + | <div> | ||
| + | <div> | ||
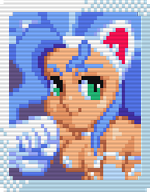
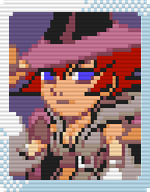
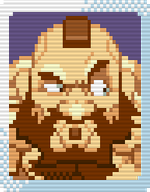
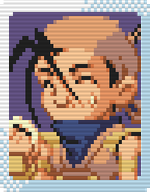
| + | <div style="display: inline-block; text-align: center">[[File:Pf-gouki-sel.png|link=Pocket_Fighter/Gouki|Gouki/Akuma]]{{Completion |percentage=5}}</div> | ||
| + | <div style="display: inline-block; text-align: center">[[File:Pf-ryu-sel.png|link=Pocket_Fighter/Ryu|Ryu]]{{Completion |percentage=5}}</div> | ||
| + | <div style="display: inline-block; text-align: center">[[File:Pf-ken-sel.png|link=Pocket_Fighter/Ken|Ken]]{{Completion |percentage=5}}</div> | ||
| + | <div style="display: inline-block; text-align: center">[[File:Pf-dan-sel.png|link=Pocket_Fighter/Dan|Dan]]{{Completion |percentage=5}}</div> | ||
| + | </div> | ||
| + | <div> | ||
| + | <div style="display: inline-block; text-align: center">[[File:Pf-chun-li-sel.png|link=Pocket_Fighter/Chun-Li|Chun-Li]]{{Completion |percentage=5}}</div> | ||
| + | <div style="display: inline-block; text-align: center">[[File:Pf-sakura-sel.png|link=Pocket_Fighter/Sakura|Sakura]]{{Completion |percentage=5}}</div> | ||
| + | <div style="display: inline-block; text-align: center">[[File:Pf-morrigan-sel.png|link=Pocket_Fighter/Morrigan|Morrigan]]{{Completion |percentage=5}}</div> | ||
| + | <div style="display: inline-block; text-align: center">[[File:Pf-lei-lei-sel.png|link=Pocket_Fighter/Lei-Lei|Lei-Lei/Hsien-Ko]]{{Completion |percentage=80}}</div> | ||
| + | </div> | ||
| + | <div> | ||
| + | <div style="display: inline-block; text-align: center">[[File:Pf-felicia-sel.png|link=Pocket_Fighter/Felicia|Felicia]]{{Completion |percentage=5}}</div> | ||
| + | <div style="display: inline-block; text-align: center">[[File:Pf-tabasa-sel.png|link=Pocket_Fighter/Tabasa|Tabasa/Tessa]]{{Completion |percentage=5}}</div> | ||
| + | <div style="display: inline-block; text-align: center">[[File:Pf-zangief-sel.png|link=Pocket_Fighter/Zangief|Zangief]]{{Completion |percentage=5}}</div> | ||
| + | <div style="display: inline-block; text-align: center">[[File:Pf-ibuki-sel.png|link=Pocket_Fighter/Ibuki|Ibuki]]{{Completion |percentage=5}}</div> | ||
| + | </div> | ||
| + | </div> | ||
| + | |||
| + | = How to Play = | ||
| + | |||
| + | == Basic Controls == | ||
| + | |||
| + | <div class="PF-how-to"> | ||
| + | === Buttons === | ||
| + | |||
| + | <div class="PF-row"> | ||
| + | <div class="PF-containerB"> | ||
| + | [[File:Pf-how-to-play.png]] | ||
| + | |||
| + | {| class="wikitable" | ||
| + | | style="text-align:center" | [[File:Pf-p.png|P|link=]] | ||
| + | | Punch | ||
| + | | style="font-size: 0.85em" | A normal punch that can initiate a Flash Combo. For AC accuracy, map this to your leftmost button (Jab). | ||
| + | |- | ||
| + | | style="text-align:center" | [[File:Pf-k.png|K|link=]]|| Kick | ||
| + | | style="font-size: 0.85em" | A normal kick, typically longer range than a punch. In AC, this was the middle button (Strong). | ||
| + | |- | ||
| + | | style="text-align:center" | [[File:Pf-s.png|S|link=]] | ||
| + | | Special | ||
| + | | style="font-size: 0.85em" | Guard Crush, Counters, and Easy Inputs. This was rightmost button in AC (Fierce). | ||
| + | |- | ||
| + | | style="text-align:center" | [[File:Pf-start.png|Taunt|link=]] | ||
| + | | Taunt | ||
| + | | style="font-size: 0.85em" | Taunt and cycle to the next item in your inventory. This was the Start button in AC. | ||
| + | |} | ||
| + | </div> | ||
| + | </div> | ||
| + | |||
| + | === Universal Commands === | ||
| + | |||
| + | <div class="PF-row"> | ||
| + | <div class="PF-containerA"> | ||
| + | <div class="PF-info-header"> | ||
| + | ==== Throw ==== | ||
| + | </div> | ||
| + | |||
| + | <div class="PF-info-text"> | ||
| + | When near your opponent, if you press the '''Punch''' and '''Kick''' buttons simultaneously you'll be able to grab and throw them. You can even do it in the '''Air'''! | ||
| + | </div> | ||
| + | |||
| + | <div class="PF-info-box"> | ||
| + | <small>'''(Near opponent)'''</small> | ||
| + | |||
| + | <big>'''[[File:Pf-p.png|link=|P]] + [[File:Pf-k.png|link=|K]]'''</big> | ||
| + | |||
| + | <small>''Throw (Air OK)''</small> | ||
| + | </div> | ||
| + | |||
| + | <div class="PF-info-box"> | ||
| + | <small>'''(Near opponent)'''</small> | ||
| + | |||
| + | <big>'''[[File:Dir-41236.png|link=|41236]] + [[File:Pf-p.png|link=|P]] + [[File:Pf-k.png|link=|K]]'''</big> | ||
| + | |||
| + | <big>'''[[File:Dir-63214.png|link=|63214]] + [[File:Pf-p.png|link=|P]] + [[File:Pf-k.png|link=|K]]'''</big> | ||
| + | |||
| + | <small>''Command Throw''</small> | ||
| + | </div> | ||
| + | |||
| + | <div class="PF-info-art"> | ||
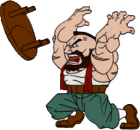
| + | [[File:Pf-art-throw.png|link=|141px]] | ||
| + | </div> | ||
| + | </div> | ||
| + | |||
| + | <div class="PF-containerA"> | ||
| + | <div class="PF-info-header"> | ||
| + | |||
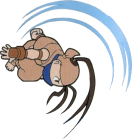
| + | ==== Dash / Run ==== | ||
| + | </div> | ||
| + | |||
| + | <div class="PF-info-text"> | ||
| + | Cover a set distance much faster than walking by performing a '''Dash'''. If you continue to hold forward after a dash, you'll transition into a '''Run'''. On top of all that, you can perform a special '''Dash Attack''' during either '''Forward Dash''' or a '''Run'''. | ||
| + | </div> | ||
| + | |||
| + | <div class="PF-info-box"> | ||
| + | <small>'''(On the ground)'''</small> | ||
| + | |||
| + | <big>'''[[File:Dir-6.png|link=|6]] [[File:Dir-6.png|link=|6]] or [[File:Dir-4.png|link=|4]] [[File:Dir-4.png|link=|4]]'''</big> | ||
| + | |||
| + | <small>''Dash and Backdash''</small> | ||
| + | </div> | ||
| + | |||
| + | <div class="PF-info-box"> | ||
| + | <small>'''(On the ground)'''</small> | ||
| + | |||
| + | <big>'''[[File:Dir-6.png|link=|6]] <nowiki>[</nowiki>[[File:Dir-6.png|link=|6]]<nowiki>]</nowiki>'''</big> | ||
| + | |||
| + | <small>''Run''</small> | ||
| + | </div> | ||
| + | |||
| + | <div class="PF-info-box"> | ||
| + | <small>'''(During Dash or Run)'''</small> | ||
| + | |||
| + | <big>'''[[File:Pf-p.png|link=|P]] or [[File:Pf-k.png|link=|K]]'''</big> | ||
| + | |||
| + | <small>''Dash Attack''</small> | ||
| + | </div> | ||
| + | |||
| + | <div class="PF-info-art"> | ||
| + | [[File:Pf-art-dash.png|link=|217px]] | ||
| + | </div> | ||
| + | </div> | ||
| + | |||
| + | </div> | ||
| + | |||
| + | <div class="PF-row"> | ||
| + | |||
| + | <div class="PF-containerA"> | ||
| + | <div class="PF-info-header"> | ||
| + | |||
| + | ==== Ground Recovery ==== | ||
| + | </div> | ||
| + | |||
| + | <div class="PF-info-text"> | ||
| + | After you fall to the ground from an unrecovered '''Launch''' or a '''Juggle''', you'll land on your back '''Knocked Down'''. To disrupt your opponent's offense, you have the option of rolling left or right before you get up by using your '''Ground Recovery'''. | ||
| + | </div> | ||
| + | |||
| + | <div class="PF-info-box"> | ||
| + | <small>'''(Knocked Down)'''</small> | ||
| + | |||
| + | <big>'''[[File:Dir-4.png|link=|4]] + [[File:Pf-p.png|link=|P]]'''</big> | ||
| + | |||
| + | <big>'''[[File:Dir-6.png|link=|6]] + [[File:Pf-p.png|link=|P]]'''</big> | ||
| + | |||
| + | <small>''Close Ground Recovery''</small> | ||
| + | |||
| + | </div> | ||
| + | |||
| + | <div class="PF-info-box"> | ||
| + | <small>'''(Knocked Down)'''</small> | ||
| + | |||
| + | <big>'''[[File:Dir-4.png|link=|4]] + [[File:Pf-k.png|link=|K]]'''</big> | ||
| + | |||
| + | <big>'''[[File:Dir-6.png|link=|6]] + [[File:Pf-k.png|link=|K]]'''</big> | ||
| + | |||
| + | <small>''Ground Recovery''</small> | ||
| + | </div> | ||
| + | |||
| + | <div class="PF-info-box"> | ||
| + | <small>'''(Knocked Down)'''</small> | ||
| + | |||
| + | <big>'''[[File:Dir-4.png|link=|4]] + [[File:Pf-s.png|link=|S]] or [[File:Pf-start.png|link=|Start]]'''</big> | ||
| + | |||
| + | <big>'''[[File:Dir-6.png|link=|6]] + [[File:Pf-s.png|link=|S]] or [[File:Pf-start.png|link=|Start]]'''</big> | ||
| + | |||
| + | <small>''Far Ground Recovery''</small> | ||
| + | </div> | ||
| + | |||
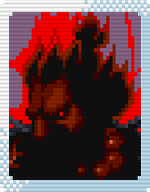
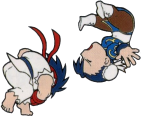
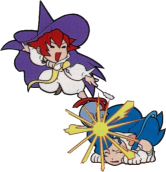
| + | <div class="PF-info-art"> | ||
| + | [[File:Pf-art-recover.png|link=|62px]] | ||
| + | </div> | ||
| + | </div> | ||
| + | |||
| + | <div class="PF-containerA"> | ||
| + | <div class="PF-info-header"> | ||
| + | |||
| + | ==== Air Recovery ==== | ||
| + | </div> | ||
| + | |||
| + | <div class="PF-info-text"> | ||
| + | After you get '''Thrown''' into the air or otherwise '''Launched''' by various different methods, you can take control of the situation and adjust your flight path by performing an '''Air Recovery'''. After flipping yourself upright again by pressing '''Punch''' and '''Kick''' in the air, you'll be able to move left or right again and start a counter attack in mid-air. However, you can't alter the direction of the flip itself. Lastly, as a result of a successful '''Air Recovery''', you'll land back on the ground on your feet instead of '''Knocked down'''. | ||
| + | </div> | ||
| + | |||
| + | <div class="PF-info-box"> | ||
| + | <small>'''(When launched)'''</small> | ||
| + | |||
| + | <big>'''[[File:Pf-jp.png|link=|j.P]] + [[File:Pf-jk.png|link=|j.K]]'''</big> | ||
| + | |||
| + | <small>''Air Recovery''</small> | ||
| + | </div> | ||
| + | |||
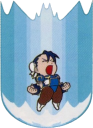
| + | <div class="PF-info-art"> | ||
| + | [[File:Pf-art-ukemi.png|link=|132px]] | ||
| + | </div> | ||
| + | </div> | ||
| + | |||
| + | |||
| + | </div> | ||
| + | |||
| + | <div class="PF-row"> | ||
| + | |||
| + | <div class="PF-containerA"> | ||
| + | <div class="PF-info-header"> | ||
| + | ==== Easy Reversal ==== | ||
| + | </div> | ||
| + | |||
| + | <div class="PF-info-text"> | ||
| + | |||
| + | </div> | ||
| + | |||
| + | <div class="PF-info-box"> | ||
| + | <small>'''(Knocked Down)'''</small> | ||
| + | |||
| + | <big>'''[[File:Pf-rs.png|link=|S (x2)]]'''</big> | ||
| + | |||
| + | <small>''Easy Reversal''</small> | ||
| + | </div> | ||
| + | |||
| + | <div class="PF-info-art"> | ||
| + | </div> | ||
| + | </div> | ||
| + | |||
| + | <div class="PF-containerA"> | ||
| + | <div class="PF-info-header"> | ||
| + | |||
| + | ==== Super Jump ==== | ||
| + | </div> | ||
| + | |||
| + | <div class="PF-info-text"> | ||
| + | |||
| + | </div> | ||
| + | |||
| + | <div class="PF-info-box"> | ||
| + | <small>'''(On the ground)'''</small> | ||
| + | |||
| + | <big>'''[[File:Dir-2.png|link=|2]] [[File:Dir-8.png|link=|8]]</big> | ||
| + | |||
| + | <small>''Super Jump''</small> | ||
| + | </div> | ||
| + | |||
| + | <div class="PF-info-art"> | ||
| + | [[File:Pf-art-jump.png|link=|120px]] | ||
| + | </div> | ||
| + | </div> | ||
| + | |||
| + | </div> | ||
| + | |||
| + | <div class="PF-row"> | ||
| + | |||
| + | <div class="PF-containerA"> | ||
| + | <div class="PF-info-header"> | ||
| + | |||
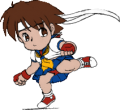
| + | ==== Pursuit Attack ==== | ||
| + | </div> | ||
| + | |||
| + | <div class="PF-info-text"> | ||
| + | After you '''Throw''' or '''Launch''' your opponent by various means, they'll enter a '''Knockdown''' state. When your opponent is '''Knocked down''', you can attack them with a '''Pursuit Attack'''. | ||
| + | </div> | ||
| + | |||
| + | <div class="PF-info-box"> | ||
| + | <small>'''(Opponent is Down)'''</small> | ||
| + | |||
| + | <big>'''[[File:Dir-8.png|link=|8]] + [[File:Pf-p.png|link=|P]]</big> | ||
| + | |||
| + | <big>'''[[File:Dir-8.png|link=|8]] + [[File:Pf-k.png|link=|K]]'''</big> | ||
| + | |||
| + | <small>''Pursuit Attack''</small> | ||
| + | </div> | ||
| + | |||
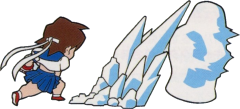
| + | <div class="PF-info-art"> | ||
| + | [[File:Pf-art-pursuit.png|link=|166px]] | ||
| + | </div> | ||
| + | </div> | ||
| + | |||
| + | |||
| + | <div class="PF-containerA"> | ||
| + | <div class="PF-info-header"> | ||
| + | ==== Item Ball Toss / Item Ball Set ==== | ||
| + | </div> | ||
| + | |||
| + | <div class="PF-info-text"> | ||
| + | Vary your offense by tossing an '''Item Ball'''. You can also hold a directional input while tossing an '''Item Ball''' to alter the trajectory, or set it on the ground for a delayed reaction. | ||
| + | </div> | ||
| + | |||
| + | <div class="PF-info-box"> | ||
| + | <small>'''(Item in inventory)'''</small> | ||
| + | |||
| + | <big>'''[[File:Pf-k.png|link=|K]] + [[File:Pf-s.png|link=|S]]'''</big> | ||
| + | |||
| + | <big>'''[[File:Dir-4.png|link=|4]] + [[File:Pf-k.png|link=|K]] + [[File:Pf-s.png|link=|S]]'''</big> | ||
| + | |||
| + | <small>''Item Ball Toss''</small> | ||
| + | </div> | ||
| + | |||
| + | <div class="PF-info-box"> | ||
| + | <small>'''(Item in inventory)'''</small> | ||
| + | |||
| + | <big>'''[[File:Dir-1.png|link=|1]] + [[File:Pf-k.png|link=|K]] + [[File:Pf-s.png|link=|S]]'''</big> | ||
| + | |||
| + | <big>'''[[File:Dir-2.png|link=|2]] + [[File:Pf-k.png|link=|K]] + [[File:Pf-s.png|link=|S]]'''</big> | ||
| + | |||
| + | <big>'''[[File:Dir-3.png|link=|3]] + [[File:Pf-k.png|link=|K]] + [[File:Pf-s.png|link=|S]]'''</big> | ||
| + | |||
| + | <small>''Item Ball Set''</small> | ||
| + | </div> | ||
| + | |||
| + | <div class="PF-info-art"> | ||
| + | [[File:Pf-art-item.png|link=|240px]] | ||
| + | </div> | ||
| + | </div> | ||
| + | |||
| + | </div> | ||
| + | |||
| + | <div class="PF-row"> | ||
| + | |||
| + | <div class="PF-containerA"> | ||
| + | <div class="PF-info-header"> | ||
| + | |||
| + | ==== Guard Cancel ==== | ||
| + | </div> | ||
| + | |||
| + | <div class="PF-info-text"> | ||
| + | Escape danger by executing a '''Guard Cancel'''. If you have at least one level of '''Mighty Combo''' gauge, you can spend it to unleash an instant unblockable counter attack. | ||
| + | </div> | ||
| + | |||
| + | <div class="PF-info-box"> | ||
| + | <small>'''(Mighty Combo LV.1+)'''</small> | ||
| + | |||
| + | <small>'''(While Blocking)'''</small> | ||
| + | |||
| + | <small>'''(On the ground)'''</small> | ||
| + | |||
| + | <big>'''[[File:Dir-6.png|link=|4]] + [[File:Pf-s.png|link=|S]]'''</big> | ||
| + | |||
| + | <small>''Guard Cancel''</small> | ||
| + | </div> | ||
| + | |||
| + | <div class="PF-info-art"> | ||
| + | [[File:Pf-art-counter.png|link=|140px]] | ||
| + | </div> | ||
| + | </div> | ||
| + | |||
| + | <div class="PF-containerA"> | ||
| + | <div class="PF-info-header"> | ||
| + | |||
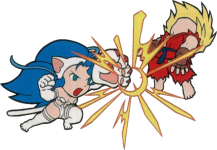
| + | ==== Mega Crush / Counter Crush ==== | ||
| + | </div> | ||
| + | |||
| + | <div class="PF-info-text"> | ||
| + | When you find yourself completely unable to find an opening for attack, or when you are '''Launched''' in the air and an '''Air Recovery''' just won't be enough, you can turn to your last resort and perform a '''Mega Crush''' (offense) or a '''Counter Crush''' (defense). In exchange for all of your '''Gems''' and all of your '''Mighty Combo''' gauge, you can create a window to break even the best defense, or escape from the best of offense. | ||
| + | </div> | ||
| + | |||
| + | <div class="PF-info-box"> | ||
| + | <small>'''(Mighty Combo LV.1+)'''</small> | ||
| + | |||
| + | <big>'''[[File:Pf-p.png|link=|P]] + [[File:Pf-k.png|link=|K]] + [[File:Pf-s.png|link=|S]]'''</big> | ||
| + | |||
| + | <small>''Mega Crush''</small> | ||
| + | </div> | ||
| + | |||
| + | <div class="PF-info-box"> | ||
| + | <small>'''(Mighty Combo LV.1+)'''</small> | ||
| + | |||
| + | <small>'''(When launched)'''</small> | ||
| + | |||
| + | <big>'''[[File:Pf-jp.png|link=|j.P]] + [[File:Pf-jk.png|link=|j.K]] + [[File:Pf-js.png|link=|j.S]]'''</big> | ||
| + | |||
| + | <small>''Counter Crush''</small> | ||
| + | </div> | ||
| + | |||
| + | <div class="PF-info-art"> | ||
| + | [[File:Pf-art-mc.png|link=|93px]] | ||
| + | </div> | ||
| + | </div> | ||
| + | |||
| + | </div> | ||
| + | |||
| + | </div> | ||
| + | |||
| + | = Gem God Tips for the Autistic (you) = | ||
| + | === Gems === | ||
| + | Hitting the opponent causes gems to fly out. Each gem colour corresponds to one of your special moves (shown at the bottom of the screen) and picking up enough of these will level up that particular special move, up to a maximum of 3. Higher level specials on average do more damage, have more hits and are in general more flashy however they can also come with greater recovery. At times the overall function of a special can significantly change based on level, so it is important to pay attention to and play around gems. | ||
| + | |||
| + | === Bubble Kara Cancel === | ||
| + | The bubble toss animation can be canceled before your opponent blocks or gets hit by it. A smart application of this would be to cancel into fireball to create an approach that controls almost the entire screen. | ||
| + | Could also be useful for oki | ||
| + | |||
| + | === Air Recovery === | ||
| + | Hold a direction before teching to tech left or right. No direction will give you a neutral tech. | ||
| + | |||
| + | You can actually move differently by teching neutrally and then pressing left or right to be more unpredictable. | ||
| + | |||
| + | When you recover you keep your momentum, you can use this to escape further pressure or surprise opponents. | ||
| + | |||
| + | === Dash === | ||
| + | Forward dashes can become a run by holding forward longer. Backdashes have no special properties like invul or anything. You cannot block during the initial dash, but a full run can be cancelled into block, among many other actions. | ||
| + | |||
| + | === Vampire Dash === | ||
| + | Morrigan and Lei-Lei have special dashes while [[File:Pf-s.png|Special]] is held. Both are able to be cancelled by specific actions. | ||
| + | |||
| + | === Prejump and landing === | ||
| + | |||
| + | Everyone has 4 frames of throw invul during prejump but you're unable to block any attack, and I think there are some frames on landing where you are vulnerable too. It might be more or only if you land from a jumping attack, i haven't tested this yet. | ||
| + | |||
| + | === Throw Invulnerability === | ||
| + | Startup and active frames of most non grab moves have throw invulnerability. exceptions: gief spd has throw invul, [[File:Pf-s.png|Special]] unblockables are throwable for the entire animation. | ||
| + | |||
| + | === Air Block === | ||
| + | Block advantage against an air blocking opponent is not the same as with an opponent on the ground. Like Vampire Savior, moves blocked in the air may be punished more easily because of the shorter block stun (it's more like attacking or throwing cancels blockstun, since you can't do anything else). In other words, just mash buttons if you find yourself blocking a move in the air. | ||
| + | |||
| + | It's not always a great idea to just air block everything though. Moves performed on the ground that leave the attacker grounded may usually have an air unblockable property. Chicken block sparingly. Also being predictable by always jumping expecting to block leaves you open to throws, but if you don't jump and they guess the airthrow you can quite easily antiair. | ||
| + | |||
| + | === Throw Tech and 2p Advantage === | ||
| + | Apparently a quirk with many cps2 games, player 2 will have the advantage in all simultaneous throw situations. Throw teching is in the game, and in most cases works like ST where you take reduced damage and recover normally, but the timing is a little weird. It's sorta like you do it right after you've been grabbed I think. When you get it it says "Tech Bonus" in big letters though so you'll know. | ||
| + | |||
| + | === Negative Edge === | ||
| + | Throws can be performed on the release of the [[File:Pf-p.png|Punch]] + [[File:Pf-k.png|Kick]] buttons immediately after entering a grounded state. There might be more to explore here if you are interested in becoming the highest level gem fighter player. | ||
| + | |||
| + | === Counter Hit === | ||
| + | Counter hits add 5 frames of extra hitstun to any move that leaves the opponent grounded and deal double the dizzy value, but they also push them further away. Also on counter hit, certain moves (such as dash attacks) cause a different launch effect, sending them bouncing about the screen. If one of these moves counters and dizzies the opponent, that will cause a special earth orbit animation to happen. Landing a counter hit against an aerial opponent seems to leave them open to another attack, but they might be able to air recover if they react fast enough. If not though, air throw. Hitting a chained low ([[File:Pf-p.png|Punch]], [[File:Pf-p.png|Punch]], [[File:Pf-k.png|Kick]] for most characters) on counter hit will cause a mini launch that allows you to follow up with much more, but this can make you whiff if you finish the chain without taking it into consideration. A counter hit [[File:Dir-3.png|3]] + [[File:Pf-p.png|Punch]] causes a much higher launch with them in the same state, but the height makes it easy for them to recover. | ||
| + | |||
| + | === Dizzy === | ||
| + | Each time you get dizzied, your total stun points will increase by 5, making it harder to dizzy you again. This effect persists between rounds. | ||
| + | |||
| + | === Launch === | ||
| + | Some specific moves and counter hits will send you flying into the air in a "Launch" state. During this animation, you have the option to use your air recovery ([[File:Pf-jp.png|Punch]] + [[File:Pf-jk.png|Kick]]) to escape. Be aware that there is another state (Juggle) that you will be locked out of air recovery, and the animation is identical. However, these moves are rare. If you see yourself being caught in a juggle "infinite" it's almost certain that you are actually in the escapable launch state and can air recover to safety. | ||
| + | |||
| + | === Knockdown and Juggle === | ||
| + | Not air recovering while in launch state will cause you to get knocked down. | ||
| + | |||
| + | In addition, certain moves (usually sweeps) will cause a special type of knockdown that begins with an untechable juggle state which cannot be escaped with air recovery. Visually this looks like your character got tripped, or is lying on their back in midair. | ||
| + | |||
| + | No matter how you are knocked down, on wake up you always have the choice of rolling by pressing backward or forward on the stick along with any button, or to wake up normally by pressing nothing. The button you pressed determines the distance you will roll. S > K > P | ||
| + | |||
| + | Rolling increases the amount of time you are on the ground, making you more vulnerable to pursuit attacks reaching you in time to combo. | ||
| + | |||
| + | === Combo into throw === | ||
| + | If a throw is active on the first frame of a jump, the game will pick a winner between the two moves at random. So it is theoretically possible to set up a frame perfect randomly inescapable throw, although very few moves have enough frame advantage to do this. One setup: Lei-lei [f0: 8, f4: 6, f7: 6, f17: j.K, f41: P+K] (Seems to work 50% of the time with P2 holding up) | ||
| + | |||
| + | === Sakura bug === | ||
| + | Sakura cannot block on wakeup lol | ||
| + | |||
| + | === Alpha Counter === | ||
| + | Consumes 1 bar. Performed with [[File:Dir-6.png|6]] + [[File:Pf-s.png|Special]] while in blockstun. Alpha Counters are capable of KOing the opponent, and certain attacks can even be linked after them. Getting a counterhit with one will knock them away though so you wont get your combo if you aren't paying attention. | ||
| + | |||
| + | === Chip Damage === | ||
| + | There is no chip damage. | ||
| + | |||
| + | === Corner Cross Up === | ||
| + | Seems like nothing or else very few things will ever cross you up while in the corner. However, some attacks can bounce you away from the wall, making you vulnerable to crossups. Something to remember for when you or your opponent are cornered. | ||
| + | |||
| + | === Meter === | ||
| + | Hitting, getting hit, whiffing normals, whiffing specials, and collecting gems will all grant you meter. Blocking gives no meter. | ||
| + | |||
| + | Big gems fill about half a bar. | ||
| + | |||
| + | The more hits you do in a combo, the more gems you'll get. Very high combo counts also give you bigger gems, meaning certain random supers can pay for themselves in meter from gems AND MORE if they actually hit. The rich get richer, so don't hoard your meter. | ||
| + | |||
| + | === Treasure Chests === | ||
| + | Hitting someone with either the fourth normal hit in a costume combo, a guard cancel, a parry, or a fully charged unblockable causes a treasure chest to appear. These chests then open upon landing, releasing either gems, food or items. | ||
| + | |||
| + | At the start of the round, a treasure chest sits in the middle of the stage. This one always holds at least one big gem and can be opened by hitting it. The gems fly out upwards in the direction of the one who opened it. It's up to you whether you want to go for it, ignore it, or try and hit someone that tries to open it for themselves. | ||
| + | |||
| + | === Backturn === | ||
| + | In some situations, either after recovering from certain attacks or simply the opponent walking under you will leave you facing the opposite way while in the air. When this happens, not only are your special move inputs reversed, but your blocking input is too. Essentially this means you may have to hold towards the opponent to block properly if they force you into this situation and keep attacking, so you have to take this into consideration as well as the direction you want to move in. Makes for a sneaky mixup. | ||
| + | |||
| + | === Hit States === | ||
| + | After you hit someone theres a number of effects that can happen. Listed underneath are the possible responses to these states. In just about every case you can burst/counter roll as well. | ||
| + | |||
| + | ==== Hit Stun ==== | ||
| + | Standard grounded hit animation after taking damage on the ground. Usually occurs while '''Standing''' or '''Crouching'''. You can't be thrown during this state. | ||
| + | * Hit OK | ||
| + | |||
| + | ==== Block Stun ==== | ||
| + | Standard grounded guard animation blocking an attack on the ground. Usually occurs while '''Standing''' or '''Crouching'''. You can't be thrown during this state. | ||
| + | * Hit OK | ||
| + | * Guard Crush OK | ||
| + | * Guard Cancel (Defender) | ||
| + | * Mega Crush (Defender) | ||
| + | |||
| + | ==== Air Block Stun ==== | ||
| + | Aerial version of the above. Usually occurs while '''Jumping'''. You can't be thrown during this state. You can actually cancel this animation by attacking or throwing in this game, making normally safe pressure punishable. | ||
| + | * Hit OK | ||
| + | * Guard Crush OK | ||
| + | * Normal Cancel (Defender) | ||
| + | * Throw Cancel (Defender) | ||
| + | |||
| + | ==== Air Reset ==== | ||
| + | You flip backward in the air, either right after getting hit in the air, or after using your '''Air Recovery'''. You are completely invincible and cannot do anything until you reach the ground in a '''Standing''' state. | ||
| + | * Meaty Potential | ||
| + | |||
| + | ==== Launch ==== | ||
| + | You flip backward in the air until you '''Air Recover''' ([[File:Pf-jp.png|Punch]] + [[File:Pf-jk.png|Kick]]), '''Counter Crush''' ([[File:Pf-p.png|Punch]] + [[File:Pf-k.png|Kick]] + [[File:Pf-s.png|Special]]) or hit the ground in a '''Knockdown''' state. Some moves cause this on counter hit, but there's a few that always do it. You'll '''Wall Splat''' if you touch the wall as well. | ||
| + | * Hit OK | ||
| + | * Air throw OK | ||
| + | * Pursuit OK | ||
| + | * Recover (defender) | ||
| + | |||
| + | ==== Juggle ==== | ||
| + | A few moves can cause an unrecoverable '''Juggle''' state. What this means is that before you hit the ground, you will be locked out of '''Air Recovery''', making you vulnerable to combos, air throws, and even guaranteed pursuit attacks. This animation looks similar to the '''Launch''' state but ''you cannot escape'', so watch out for these moves. All sweeps, some low hitting dash attacks, and some special moves fall into this category, so make sure you learn what this animation looks like. Also if you '''Wall Splat''' it will still be possible to air throw you, but you'll gain strike invulnerability right before you hit the ground (not immediately though, there is a small window to hit you again). | ||
| + | * Hit OK | ||
| + | * Air throw OK | ||
| + | |||
| + | ==== Knockdown ==== | ||
| + | This is the animation after you fell down from either '''Launch''' or '''Juggle''' state. A fighting game staple. The reason to distinguish this from the '''Launch''' and '''Juggle''' states is because in this game you can be attacked during the '''Knockdown''' state with a '''Pursuit Attack''', similar to the Vampire games. This state can sometimes occur in midair. | ||
| + | * Pursuit OK | ||
| + | * Meaty Potential | ||
| + | * Tech Roll (Defender) | ||
| + | * Easy Reversal (Defender) | ||
| + | |||
| + | ==== Wall Splat ==== | ||
| + | Many moves when they knock you back can cause you to splat against the wall. After a '''Wall Splat''', it will still be possible to air throw you, but you will gain strike invulnerablility shortly afterward. However in some cases a character will have the tools to continue the combo before this happens (most notoriously Zangief's lariat). | ||
| + | * Hit OK (Small window) | ||
| + | * Airthrow OK | ||
| + | * Recover (defender) | ||
| + | |||
| + | ==== Wall Bounce ==== | ||
| + | Counter hit only. Only certain moves can do this. Makes you bounce at high speed off of the wall and actually continue to the ceiling and opposite wall. Additionally, you gain an unblockable hitbox that does very very tiny damage, resulting in some silliness. It's possible to hit someone again while they're bouncing around, but pretty hard due to the hitbox and flight path, as well as them being able to recover. | ||
| + | * Hit OK | ||
| + | * Air throw OK | ||
| + | * Meaty Potential | ||
| + | * Recover (defender) | ||
| + | |||
| + | ==== Earth Orbit ==== | ||
| + | Counter hit only. Occurs when any move that would have triggered a '''Wall Bounce''' also causes dizzy. Also gives you a hitbox like the '''Wall Bounce''' and you can hit or grab them as they come back onto the screen before landing if you really want to. | ||
| + | * Hit OK | ||
| + | * Air Throw OK | ||
| + | * Meaty Potential | ||
| + | * Mash out (defender) | ||
| + | |||
| + | |||
| + | === Item Effects === | ||
| + | |||
| + | ==== Shocked ==== | ||
| + | You got electrocuted, either by the lightning item or by '''Kaminari'''. Similar to the standard '''Launch''', except that you can only be airthrown (if they can even reach) and can't '''Air Recover'''. | ||
| + | * Air throw OK | ||
| + | |||
| + | ==== Petrified ==== | ||
| + | Caused by certain grabs and the stone item. You get turned to stone for a length of time, during which almost any hit will shatter you. Afterwards you reappear knocked down where you were, though sometimes certain single hit attacks avoid this somehow and keep their properties. While turned to stone you can only be hit (by a single hit), not grabbed, and you can mash to free yourself faster. | ||
| + | * Hit OK | ||
| + | * Mash out (defender) | ||
| + | |||
| + | ==== Frozen ==== | ||
| + | Get hit by the ice item while on the ground and you'll be frozen solid for a length of time. During this you can be hit by anything except throws and you're treated as standing when they do so, meaning they can get a full combo of whatever. You can mash to get out a little quicker. | ||
| + | * Hit OK | ||
| + | * Mash out (defender) | ||
| + | |||
| + | ==== Poison Stun ==== | ||
| + | Get hit by the poison item either on the ground or in the air and you'll get dizzied. It works more or less the same as the normal stun in regards to what you can be hit by (anything and everything), but it's different in that you recover much faster and can therefore mash out of it even quicker. | ||
| + | * You can do anything you want because they are dizzy, just be quick about it | ||
| + | |||
| + | ==== Blown up ==== | ||
| + | Getting hit by any of the other items or the ice while in the air will send you into the air in an unrecoverable state where you can be hit with anything or will land knocked down. The direction you fly in depends on what item you were hit with. Fire and bomb go straight up, with bomb going up much further. Aerial ice and banana knock you back, though banana is much lower to the ground and harder to follow up from. | ||
| + | * Hit OK | ||
| + | * Airthrow OK | ||
| + | |||
| + | == Comparisons == | ||
| + | [[File:Pf-group.png|none|480px|right]] | ||
| + | ==== Health ==== | ||
| + | Each character has 145 HP. However, there is also a guts factor that will affect how much attack damage will be reduced at different health values which varies per character. I don't know what the exact guts mechanics are but I tested how many hits it takes to kill with Lei-Lei's 2P, and how much lifebar they had before the final hit. | ||
| + | |||
| + | {| class="wikitable" style="text-align:left; border-collapse:collapse" | ||
| + | ! Character !! Hits !! Last hit Health | ||
| + | |- | ||
| + | | Zangief || 49 || - | ||
| + | |- | ||
| + | | Tabasa || 41 || 3px | ||
| + | |- | ||
| + | | Ryu || 41 || 2px | ||
| + | |- | ||
| + | | Morrigan || 41 || 2px | ||
| + | |- | ||
| + | | Ken || 41 || 0px | ||
| + | |- | ||
| + | | Chun-Li || 41 || 0px | ||
| + | |- | ||
| + | | Lei-Lei || 41 || 0px | ||
| + | |- | ||
| + | | Felicia || 41 || 0px | ||
| + | |- | ||
| + | | Ibuki || 41 || 0px | ||
| + | |- | ||
| + | | Dan || 41 || 0px | ||
| + | |- | ||
| + | | Sakura || 40 || 1px | ||
| + | |- | ||
| + | | Gouki || 38 || - | ||
| + | |} | ||
| + | |||
| + | ==== Dizzy ==== | ||
| + | {| class="wikitable" style="text-align:left; border-collapse:collapse" | ||
| + | ! Character !! Dizzy | ||
| + | |- | ||
| + | | Zangief || 50 | ||
| + | |- | ||
| + | | Lei-Lei || 45 | ||
| + | |- | ||
| + | | Ryu || 40 | ||
| + | |- | ||
| + | | Ken || 40 | ||
| + | |- | ||
| + | | Chun-Li || 40 | ||
| + | |- | ||
| + | | Sakura || 40 | ||
| + | |- | ||
| + | | Morrigan || 40 | ||
| + | |- | ||
| + | | Ibuki || 40 | ||
| + | |- | ||
| + | | Felicia || 35 | ||
| + | |- | ||
| + | | Tabasa || 35 | ||
| + | |- | ||
| + | | Dan || 35 | ||
| + | |- | ||
| + | | Gouki || 30 | ||
| + | |} | ||
| + | |||
| + | == How to play (old version, redoing) == | ||
| + | Controls | ||
| + | [[File:Pf-how-to-play.png|thumb|none|Recommended button mapping: Jab = P, Strong = K, Fierce = S|2000px]] | ||
| + | [[File:Pf-p.png|Punch]] = Punch | ||
| + | |||
| + | [[File:Pf-k.png|Kick]] = Kick | ||
| + | |||
| + | [[File:Pf-s.png|Special]] = Special | ||
| + | * (See: Guard Crush, Easy Inputs) | ||
| + | |||
| + | [[File:Pf-start.png|Start]] = Taunt | ||
| + | |||
| + | |||
| + | [[File:Pf-p.png|Punch]] + [[File:Pf-k.png|Kick]] = Throw | ||
| + | |||
| + | [[File:Pf-jp.png|Punch]] + [[File:Pf-jk.png|Kick]] = Air Throw | ||
| + | |||
| + | |||
| + | [[File:Pf-s.png|Special]] + [[File:Pf-k.png|Kick]] = Bubble Toss | ||
| + | * <b>(The trajectory can be changed depending on the direction held)</b> | ||
| + | * <b>(Down inputs will place it on the ground or roll it forward, with it detonating after a short time)</b> | ||
| + | * <b>(Special cancel window starts <i>before</i> contact with opponent)</b> | ||
| + | |||
| + | |||
| + | [[File:Pf-p.png|Punch]] + [[File:Pf-k.png|Kick]] + [[File:Pf-s.png|Special]] = Mega Crush | ||
| + | * (See: Mega Crush/Counter Crush) | ||
| + | |||
| + | |||
| + | [[File:Pf-jp.png|Punch]] + [[File:Pf-jk.png|Kick]] = Air Tech | ||
| + | * (Input when you are in a Launch state to escape fake combos and land on your feet) | ||
| + | * <b>(Not always a good option. Pay close attention to your opponent's offense)</b> | ||
| + | * (The trajectory can be changed depending on the direction held) | ||
| + | |||
| + | |||
| + | [[File:Dir-4.png|4]] = Block | ||
| + | |||
| + | [[File:Dir-1.png|1]] = Low Block | ||
| + | |||
| + | ([[File:Pf-air.png|Air]]) [[File:Dir-4.png|4]] or [[File:Dir-1.png|1]] or [[File:Dir-7.png|7]] = Air block | ||
| + | * (Air blockstun can be cancelled with normals; <b>advantage-on-block moves become punishable</b>) | ||
| + | * (Grounded normals are <b>air unblockable</b>) | ||
| + | |||
| + | |||
| + | [[File:Dir-7.png|7]] or [[File:Dir-8.png|8]] or [[File:Dir-9.png|9]] = Jump | ||
| + | * (6F: [[File:Pf-icon-ryu.png|Ryu]][[File:Pf-icon-ken.png|Ken]][[File:Pf-icon-sakura.png|Sakura]][[File:Pf-icon-felicia.png|Felicia]][[File:Pf-icon-gouki.png|Gouki/Akuma]][[File:Pf-icon-dan.png|Dan]]) | ||
| + | * (7F: [[File:Pf-icon-chun-li.png|Chun-Li]][[File:Pf-icon-morrigan.png]][[File:Pf-icon-lei-lei.png|Lei-Lei/Hsien-Ko]][[File:Pf-icon-tabasa.png|Tabasa]][[File:Pf-icon-ibuki.png|Ibuki]]) | ||
| + | * (8F: [[File:Pf-icon-zangief.png|Zangief]]) | ||
| + | |||
| + | [[File:Dir-2.png|2]] [[File:Dir-8.png|8]] = Super Jump | ||
| + | * (7F: [[File:Pf-icon-ryu.png|Ryu]][[File:Pf-icon-ken.png|Ken]][[File:Pf-icon-chun-li.png|Chun-Li]][[File:Pf-icon-sakura.png|Sakura]][[File:Pf-icon-morrigan.png]][[File:Pf-icon-lei-lei.png|Lei-Lei/Hsien-Ko]][[File:Pf-icon-gouki.png|Gouki/Akuma]][[File:Pf-icon-dan.png|Dan]]) | ||
| + | * (9F: [[File:Pf-icon-felicia.png|Felicia]][[File:Pf-icon-tabasa.png|Tabasa]][[File:Pf-icon-ibuki.png|Ibuki]]) | ||
| + | * (11F: [[File:Pf-icon-zangief.png|Zangief]]) | ||
| + | |||
| + | |||
| + | [[File:Dir-6.png|6]] [[File:Dir-6.png|6]] = Dash | ||
| + | |||
| + | [[File:Dir-4.png|4]] [[File:Dir-4.png|4]] = Backdash | ||
| + | |||
| + | |||
| + | [[File:Dir-6.png|6]] [[File:Dir-6.png|6]] + [[File:Pf-p.png|Punch]] = Dash Attack P | ||
| + | * (Low: [[File:Pf-icon-chun-li.png|Chun-Li]]) | ||
| + | * (Crouch Crossup: [[File:Pf-icon-zangief.png|Zangief]][[File:Pf-icon-dan.png|Dan]]) | ||
| + | * (Fake Overhead: [[File:Pf-icon-dan.png|Dan]]) | ||
| + | * (Whiff on crouching: [[File:Pf-icon-zangief.png|Zangief]]) | ||
| + | |||
| + | |||
| + | [[File:Dir-6.png|6]] [[File:Dir-6.png|6]] + [[File:Pf-k.png|Kick]] = Dash Attack K | ||
| + | * (Overhead: [[File:Pf-icon-ryu.png|Ryu]][[File:Pf-icon-ken.png|Ken]][[File:Pf-icon-chun-li.png|Chun-Li]][[File:Pf-icon-zangief.png|Zangief]]) | ||
| + | * (Low: [[File:Pf-icon-sakura.png|Sakura]][[File:Pf-icon-morrigan.png]][[File:Pf-icon-lei-lei.png|Lei-Lei/Hsien-Ko]][[File:Pf-icon-felicia.png|Felicia]][[File:Pf-icon-tabasa.png|Tabasa]][[File:Pf-icon-ibuki.png|Ibuki]][[File:Pf-icon-gouki.png|Gouki/Akuma]]) | ||
| + | * (Crouch Crossup: [[File:Pf-icon-zangief.png|Zangief]][[File:Pf-icon-dan.png|Dan]]) | ||
| + | * (Whiff on crouching: [[File:Pf-icon-dan.png|Dan]]) | ||
| + | |||
| + | |||
| + | [[File:Dir-2.png|2]] + [[File:Pf-p.png|Punch]] = Low P | ||
| + | * (Despite appearances, <b>this move will always need to be blocked low</b>) | ||
| + | * <b>(This move can be special cancelled by every character in the game)</b> | ||
| + | * (Can be useful for challenging pressure and punishing negative moves) | ||
| + | * (Multi-hit: [[File:Pf-icon-morrigan.png|Morrigan]]) | ||
| + | |||
| + | |||
| + | [[File:Dir-2.png|2]] + [[File:Pf-k.png|Kick]] = Low K | ||
| + | * (Special Cancel: [[File:Pf-icon-ryu.png|Ryu]][[File:Pf-icon-ken.png|Ken]][[File:Pf-icon-chun-li.png|Chun-Li]][[File:Pf-icon-sakura.png|Sakura]][[File:Pf-icon-felicia.png|Felicia]][[File:Pf-icon-zangief.png|Zangief]][[File:Pf-icon-ibuki.png|Ibuki]][[File:Pf-icon-gouki.png|Gouki/Akuma]][[File:Pf-icon-dan.png|Dan]]) | ||
| + | * (Knockdown: [[File:Pf-icon-morrigan.png|Morrigan]][[File:Pf-icon-lei-lei.png|Lei-Lei/Hsien-Ko]]) | ||
| + | * (Multi-hit: [[File:Pf-icon-tabasa.png|Tabasa/Tessa]]) | ||
| + | |||
| + | |||
| + | [[File:Dir-3.png|3]] + [[File:Pf-p.png|Punch]] = Launcher | ||
| + | * <b>(Launch State on Counter-Hit only)</b> | ||
| + | * (Special Cancel: [[File:Pf-icon-ryu.png|Ryu]][[File:Pf-icon-ken.png|Ken]][[File:Pf-icon-chun-li.png|Chun-Li]][[File:Pf-icon-sakura.png|Sakura]][[File:Pf-icon-lei-lei.png|Lei-Lei/Hsien-Ko]][[File:Pf-icon-felicia.png|Felicia]][[File:Pf-icon-ibuki.png|Ibuki]][[File:Pf-icon-gouki.png|Gouki/Akuma]][[File:Pf-icon-dan.png|Dan]]) | ||
| + | |||
| + | |||
| + | [[File:Dir-3.png|3]] + [[File:Pf-k.png|Kick]] = Sweep | ||
| + | * ([[File:Pf-icon-morrigan.png|Morrigan]][[File:Pf-icon-lei-lei.png|Lei-Lei/Hsien-Ko]]: Same as [[File:Dir-2.png|2]] + [[File:Pf-k.png|Kick]]) | ||
| + | |||
| + | |||
| + | [[File:Dir-8.png|8]] + [[File:Pf-p.png|Punch]] or [[File:Pf-k.png|Kick]] = Pursuit | ||
| + | * (Input when the opponent is in a knockdown state) | ||
| + | |||
| + | Guard Crush | ||
| + | [[File:Pf-s.png|Special]] = Red gem Guard Crush | ||
| + | |||
| + | [[File:Dir-6.png|6]] + [[File:Pf-s.png|Special]] = Yellow gem Guard Crush | ||
| + | |||
| + | [[File:Dir-2.png|6]] + [[File:Pf-s.png|Special]] = Blue gem Guard Crush | ||
| + | * (Each Guard Crush can be charged to do more damage and steal more gems on hit by holding the button | ||
| + | |||
| + | |||
| + | [[File:Dir-4.png|6]] + [[File:Pf-s.png|Special]] = Guard Crush counter | ||
| + | * <b>(Can only counter Guard Crushes.</b> Counter window is while flashing blue, then has a whiff animation.) | ||
| + | |||
| + | </div> | ||
| + | <div style="display: flex; flex-direction: column; flex:1; min-width:300px; padding: 1em"> | ||
| + | <div style="display:flex;flex-direction: column; margin: 0;"> | ||
| + | {{Infobox | ||
| + | |image = [[File:Pf-flyer2.png | 276px]] | ||
| + | |smartass = Pocket Fighter / Super Gem Fighter: Mini Mix | ||
| + | |developer = [https://en.wikipedia.org/wiki/Capcom Capcom] | ||
| + | |publisher = [https://en.wikipedia.org/wiki/Capcom Capcom] | ||
| + | |players = 2 | ||
| + | |platform = [https://en.wikipedia.org/wiki/CP_System_II CPS-2] | ||
| + | |emulator = [https://www.fightcade.com/game/sgemf Fightcade] | ||
| + | }} | ||
| + | </div> | ||
| + | <div style="display:flex;flex-direction: column; margin: 5px;">__TOC__</div> | ||
| + | </div> | ||
| + | </div> | ||
Revision as of 15:41, 6 March 2022
Pocket Fighter AKA Super Gem Fighter: Mini Mix
1997 Capcom
Pages being reworked. Please check back later, or attempt to make sense of this mess.
Competitive Footage[edit]
Mar. 30, 2013 a-cho Pocket Fighter 1-on-1 Taikai
Mar. 30, 2013 a-cho Pocket Fighter Casuals
Nov. 24, 2020 Mikado Street Fighter Carnival 18 第21戦: Pocket Fighter
Nov. 25, 2020 Mikado Pocket Fighter Casuals
Characters[edit]
How to Play[edit]
Basic Controls[edit]
Buttons[edit]

| Punch | A normal punch that can initiate a Flash Combo. For AC accuracy, map this to your leftmost button (Jab). | |
| Kick | A normal kick, typically longer range than a punch. In AC, this was the middle button (Strong). | |
| Special | Guard Crush, Counters, and Easy Inputs. This was rightmost button in AC (Fierce). | |
| Taunt | Taunt and cycle to the next item in your inventory. This was the Start button in AC. |
Universal Commands[edit]
Throw[edit]
When near your opponent, if you press the Punch and Kick buttons simultaneously you'll be able to grab and throw them. You can even do it in the Air!
(Near opponent)
![]() +
+ ![]()
Throw (Air OK)
(Near opponent)
![]() +
+ ![]() +
+ ![]()
![]() +
+ ![]() +
+ ![]()
Command Throw
Dash / Run[edit]
Cover a set distance much faster than walking by performing a Dash. If you continue to hold forward after a dash, you'll transition into a Run. On top of all that, you can perform a special Dash Attack during either Forward Dash or a Run.
(On the ground)
![]()
![]() or
or ![]()
![]()
Dash and Backdash
(On the ground)
![]() [
[![]() ]
]
Run
(During Dash or Run)
![]() or
or ![]()
Dash Attack
Ground Recovery[edit]
After you fall to the ground from an unrecovered Launch or a Juggle, you'll land on your back Knocked Down. To disrupt your opponent's offense, you have the option of rolling left or right before you get up by using your Ground Recovery.
(Knocked Down)
![]() +
+ ![]()
![]() +
+ ![]()
Close Ground Recovery
(Knocked Down)
![]() +
+ ![]()
![]() +
+ ![]()
Ground Recovery
(Knocked Down)
![]() +
+ ![]() or
or ![]()
![]() +
+ ![]() or
or ![]()
Far Ground Recovery

Air Recovery[edit]
After you get Thrown into the air or otherwise Launched by various different methods, you can take control of the situation and adjust your flight path by performing an Air Recovery. After flipping yourself upright again by pressing Punch and Kick in the air, you'll be able to move left or right again and start a counter attack in mid-air. However, you can't alter the direction of the flip itself. Lastly, as a result of a successful Air Recovery, you'll land back on the ground on your feet instead of Knocked down.
(When launched)
![]() +
+ ![]()
Air Recovery
Pursuit Attack[edit]
After you Throw or Launch your opponent by various means, they'll enter a Knockdown state. When your opponent is Knocked down, you can attack them with a Pursuit Attack.
(Opponent is Down)
![]() +
+ ![]()
![]() +
+ ![]()
Pursuit Attack
Item Ball Toss / Item Ball Set[edit]
Vary your offense by tossing an Item Ball. You can also hold a directional input while tossing an Item Ball to alter the trajectory, or set it on the ground for a delayed reaction.
(Item in inventory)
![]() +
+ ![]()
![]() +
+ ![]() +
+ ![]()
Item Ball Toss
(Item in inventory)
![]() +
+ ![]() +
+ ![]()
![]() +
+ ![]() +
+ ![]()
![]() +
+ ![]() +
+ ![]()
Item Ball Set
Guard Cancel[edit]
Escape danger by executing a Guard Cancel. If you have at least one level of Mighty Combo gauge, you can spend it to unleash an instant unblockable counter attack.
(Mighty Combo LV.1+)
(While Blocking)
(On the ground)
![]() +
+ ![]()
Guard Cancel
Mega Crush / Counter Crush[edit]
When you find yourself completely unable to find an opening for attack, or when you are Launched in the air and an Air Recovery just won't be enough, you can turn to your last resort and perform a Mega Crush (offense) or a Counter Crush (defense). In exchange for all of your Gems and all of your Mighty Combo gauge, you can create a window to break even the best defense, or escape from the best of offense.
(Mighty Combo LV.1+)
![]() +
+ ![]() +
+ ![]()
Mega Crush
(Mighty Combo LV.1+)
(When launched)
![]() +
+ ![]() +
+ ![]()
Counter Crush
Gem God Tips for the Autistic (you)[edit]
Gems[edit]
Hitting the opponent causes gems to fly out. Each gem colour corresponds to one of your special moves (shown at the bottom of the screen) and picking up enough of these will level up that particular special move, up to a maximum of 3. Higher level specials on average do more damage, have more hits and are in general more flashy however they can also come with greater recovery. At times the overall function of a special can significantly change based on level, so it is important to pay attention to and play around gems.
Bubble Kara Cancel[edit]
The bubble toss animation can be canceled before your opponent blocks or gets hit by it. A smart application of this would be to cancel into fireball to create an approach that controls almost the entire screen. Could also be useful for oki
Air Recovery[edit]
Hold a direction before teching to tech left or right. No direction will give you a neutral tech.
You can actually move differently by teching neutrally and then pressing left or right to be more unpredictable.
When you recover you keep your momentum, you can use this to escape further pressure or surprise opponents.
Dash[edit]
Forward dashes can become a run by holding forward longer. Backdashes have no special properties like invul or anything. You cannot block during the initial dash, but a full run can be cancelled into block, among many other actions.
Vampire Dash[edit]
Morrigan and Lei-Lei have special dashes while ![]() is held. Both are able to be cancelled by specific actions.
is held. Both are able to be cancelled by specific actions.
Prejump and landing[edit]
Everyone has 4 frames of throw invul during prejump but you're unable to block any attack, and I think there are some frames on landing where you are vulnerable too. It might be more or only if you land from a jumping attack, i haven't tested this yet.
Throw Invulnerability[edit]
Startup and active frames of most non grab moves have throw invulnerability. exceptions: gief spd has throw invul, ![]() unblockables are throwable for the entire animation.
unblockables are throwable for the entire animation.
Air Block[edit]
Block advantage against an air blocking opponent is not the same as with an opponent on the ground. Like Vampire Savior, moves blocked in the air may be punished more easily because of the shorter block stun (it's more like attacking or throwing cancels blockstun, since you can't do anything else). In other words, just mash buttons if you find yourself blocking a move in the air.
It's not always a great idea to just air block everything though. Moves performed on the ground that leave the attacker grounded may usually have an air unblockable property. Chicken block sparingly. Also being predictable by always jumping expecting to block leaves you open to throws, but if you don't jump and they guess the airthrow you can quite easily antiair.
Throw Tech and 2p Advantage[edit]
Apparently a quirk with many cps2 games, player 2 will have the advantage in all simultaneous throw situations. Throw teching is in the game, and in most cases works like ST where you take reduced damage and recover normally, but the timing is a little weird. It's sorta like you do it right after you've been grabbed I think. When you get it it says "Tech Bonus" in big letters though so you'll know.
Negative Edge[edit]
Throws can be performed on the release of the ![]() +
+ ![]() buttons immediately after entering a grounded state. There might be more to explore here if you are interested in becoming the highest level gem fighter player.
buttons immediately after entering a grounded state. There might be more to explore here if you are interested in becoming the highest level gem fighter player.
Counter Hit[edit]
Counter hits add 5 frames of extra hitstun to any move that leaves the opponent grounded and deal double the dizzy value, but they also push them further away. Also on counter hit, certain moves (such as dash attacks) cause a different launch effect, sending them bouncing about the screen. If one of these moves counters and dizzies the opponent, that will cause a special earth orbit animation to happen. Landing a counter hit against an aerial opponent seems to leave them open to another attack, but they might be able to air recover if they react fast enough. If not though, air throw. Hitting a chained low (![]() ,
, ![]() ,
, ![]() for most characters) on counter hit will cause a mini launch that allows you to follow up with much more, but this can make you whiff if you finish the chain without taking it into consideration. A counter hit
for most characters) on counter hit will cause a mini launch that allows you to follow up with much more, but this can make you whiff if you finish the chain without taking it into consideration. A counter hit ![]() +
+ ![]() causes a much higher launch with them in the same state, but the height makes it easy for them to recover.
causes a much higher launch with them in the same state, but the height makes it easy for them to recover.
Dizzy[edit]
Each time you get dizzied, your total stun points will increase by 5, making it harder to dizzy you again. This effect persists between rounds.
Launch[edit]
Some specific moves and counter hits will send you flying into the air in a "Launch" state. During this animation, you have the option to use your air recovery (![]() +
+ ![]() ) to escape. Be aware that there is another state (Juggle) that you will be locked out of air recovery, and the animation is identical. However, these moves are rare. If you see yourself being caught in a juggle "infinite" it's almost certain that you are actually in the escapable launch state and can air recover to safety.
) to escape. Be aware that there is another state (Juggle) that you will be locked out of air recovery, and the animation is identical. However, these moves are rare. If you see yourself being caught in a juggle "infinite" it's almost certain that you are actually in the escapable launch state and can air recover to safety.
Knockdown and Juggle[edit]
Not air recovering while in launch state will cause you to get knocked down.
In addition, certain moves (usually sweeps) will cause a special type of knockdown that begins with an untechable juggle state which cannot be escaped with air recovery. Visually this looks like your character got tripped, or is lying on their back in midair.
No matter how you are knocked down, on wake up you always have the choice of rolling by pressing backward or forward on the stick along with any button, or to wake up normally by pressing nothing. The button you pressed determines the distance you will roll. S > K > P
Rolling increases the amount of time you are on the ground, making you more vulnerable to pursuit attacks reaching you in time to combo.
Combo into throw[edit]
If a throw is active on the first frame of a jump, the game will pick a winner between the two moves at random. So it is theoretically possible to set up a frame perfect randomly inescapable throw, although very few moves have enough frame advantage to do this. One setup: Lei-lei [f0: 8, f4: 6, f7: 6, f17: j.K, f41: P+K] (Seems to work 50% of the time with P2 holding up)
Sakura bug[edit]
Sakura cannot block on wakeup lol
Alpha Counter[edit]
Consumes 1 bar. Performed with ![]() +
+ ![]() while in blockstun. Alpha Counters are capable of KOing the opponent, and certain attacks can even be linked after them. Getting a counterhit with one will knock them away though so you wont get your combo if you aren't paying attention.
while in blockstun. Alpha Counters are capable of KOing the opponent, and certain attacks can even be linked after them. Getting a counterhit with one will knock them away though so you wont get your combo if you aren't paying attention.
Chip Damage[edit]
There is no chip damage.
Corner Cross Up[edit]
Seems like nothing or else very few things will ever cross you up while in the corner. However, some attacks can bounce you away from the wall, making you vulnerable to crossups. Something to remember for when you or your opponent are cornered.
Meter[edit]
Hitting, getting hit, whiffing normals, whiffing specials, and collecting gems will all grant you meter. Blocking gives no meter.
Big gems fill about half a bar.
The more hits you do in a combo, the more gems you'll get. Very high combo counts also give you bigger gems, meaning certain random supers can pay for themselves in meter from gems AND MORE if they actually hit. The rich get richer, so don't hoard your meter.
Treasure Chests[edit]
Hitting someone with either the fourth normal hit in a costume combo, a guard cancel, a parry, or a fully charged unblockable causes a treasure chest to appear. These chests then open upon landing, releasing either gems, food or items.
At the start of the round, a treasure chest sits in the middle of the stage. This one always holds at least one big gem and can be opened by hitting it. The gems fly out upwards in the direction of the one who opened it. It's up to you whether you want to go for it, ignore it, or try and hit someone that tries to open it for themselves.
Backturn[edit]
In some situations, either after recovering from certain attacks or simply the opponent walking under you will leave you facing the opposite way while in the air. When this happens, not only are your special move inputs reversed, but your blocking input is too. Essentially this means you may have to hold towards the opponent to block properly if they force you into this situation and keep attacking, so you have to take this into consideration as well as the direction you want to move in. Makes for a sneaky mixup.
Hit States[edit]
After you hit someone theres a number of effects that can happen. Listed underneath are the possible responses to these states. In just about every case you can burst/counter roll as well.
Hit Stun[edit]
Standard grounded hit animation after taking damage on the ground. Usually occurs while Standing or Crouching. You can't be thrown during this state.
- Hit OK
Block Stun[edit]
Standard grounded guard animation blocking an attack on the ground. Usually occurs while Standing or Crouching. You can't be thrown during this state.
- Hit OK
- Guard Crush OK
- Guard Cancel (Defender)
- Mega Crush (Defender)
Air Block Stun[edit]
Aerial version of the above. Usually occurs while Jumping. You can't be thrown during this state. You can actually cancel this animation by attacking or throwing in this game, making normally safe pressure punishable.
- Hit OK
- Guard Crush OK
- Normal Cancel (Defender)
- Throw Cancel (Defender)
Air Reset[edit]
You flip backward in the air, either right after getting hit in the air, or after using your Air Recovery. You are completely invincible and cannot do anything until you reach the ground in a Standing state.
- Meaty Potential
Launch[edit]
You flip backward in the air until you Air Recover (![]() +
+ ![]() ), Counter Crush (
), Counter Crush (![]() +
+ ![]() +
+ ![]() ) or hit the ground in a Knockdown state. Some moves cause this on counter hit, but there's a few that always do it. You'll Wall Splat if you touch the wall as well.
) or hit the ground in a Knockdown state. Some moves cause this on counter hit, but there's a few that always do it. You'll Wall Splat if you touch the wall as well.
- Hit OK
- Air throw OK
- Pursuit OK
- Recover (defender)
Juggle[edit]
A few moves can cause an unrecoverable Juggle state. What this means is that before you hit the ground, you will be locked out of Air Recovery, making you vulnerable to combos, air throws, and even guaranteed pursuit attacks. This animation looks similar to the Launch state but you cannot escape, so watch out for these moves. All sweeps, some low hitting dash attacks, and some special moves fall into this category, so make sure you learn what this animation looks like. Also if you Wall Splat it will still be possible to air throw you, but you'll gain strike invulnerability right before you hit the ground (not immediately though, there is a small window to hit you again).
- Hit OK
- Air throw OK
Knockdown[edit]
This is the animation after you fell down from either Launch or Juggle state. A fighting game staple. The reason to distinguish this from the Launch and Juggle states is because in this game you can be attacked during the Knockdown state with a Pursuit Attack, similar to the Vampire games. This state can sometimes occur in midair.
- Pursuit OK
- Meaty Potential
- Tech Roll (Defender)
- Easy Reversal (Defender)
Wall Splat[edit]
Many moves when they knock you back can cause you to splat against the wall. After a Wall Splat, it will still be possible to air throw you, but you will gain strike invulnerablility shortly afterward. However in some cases a character will have the tools to continue the combo before this happens (most notoriously Zangief's lariat).
- Hit OK (Small window)
- Airthrow OK
- Recover (defender)
Wall Bounce[edit]
Counter hit only. Only certain moves can do this. Makes you bounce at high speed off of the wall and actually continue to the ceiling and opposite wall. Additionally, you gain an unblockable hitbox that does very very tiny damage, resulting in some silliness. It's possible to hit someone again while they're bouncing around, but pretty hard due to the hitbox and flight path, as well as them being able to recover.
- Hit OK
- Air throw OK
- Meaty Potential
- Recover (defender)
Earth Orbit[edit]
Counter hit only. Occurs when any move that would have triggered a Wall Bounce also causes dizzy. Also gives you a hitbox like the Wall Bounce and you can hit or grab them as they come back onto the screen before landing if you really want to.
- Hit OK
- Air Throw OK
- Meaty Potential
- Mash out (defender)
Item Effects[edit]
Shocked[edit]
You got electrocuted, either by the lightning item or by Kaminari. Similar to the standard Launch, except that you can only be airthrown (if they can even reach) and can't Air Recover.
- Air throw OK
Petrified[edit]
Caused by certain grabs and the stone item. You get turned to stone for a length of time, during which almost any hit will shatter you. Afterwards you reappear knocked down where you were, though sometimes certain single hit attacks avoid this somehow and keep their properties. While turned to stone you can only be hit (by a single hit), not grabbed, and you can mash to free yourself faster.
- Hit OK
- Mash out (defender)
Frozen[edit]
Get hit by the ice item while on the ground and you'll be frozen solid for a length of time. During this you can be hit by anything except throws and you're treated as standing when they do so, meaning they can get a full combo of whatever. You can mash to get out a little quicker.
- Hit OK
- Mash out (defender)
Poison Stun[edit]
Get hit by the poison item either on the ground or in the air and you'll get dizzied. It works more or less the same as the normal stun in regards to what you can be hit by (anything and everything), but it's different in that you recover much faster and can therefore mash out of it even quicker.
- You can do anything you want because they are dizzy, just be quick about it
Blown up[edit]
Getting hit by any of the other items or the ice while in the air will send you into the air in an unrecoverable state where you can be hit with anything or will land knocked down. The direction you fly in depends on what item you were hit with. Fire and bomb go straight up, with bomb going up much further. Aerial ice and banana knock you back, though banana is much lower to the ground and harder to follow up from.
- Hit OK
- Airthrow OK
Comparisons[edit]

Health[edit]
Each character has 145 HP. However, there is also a guts factor that will affect how much attack damage will be reduced at different health values which varies per character. I don't know what the exact guts mechanics are but I tested how many hits it takes to kill with Lei-Lei's 2P, and how much lifebar they had before the final hit.
| Character | Hits | Last hit Health |
|---|---|---|
| Zangief | 49 | - |
| Tabasa | 41 | 3px |
| Ryu | 41 | 2px |
| Morrigan | 41 | 2px |
| Ken | 41 | 0px |
| Chun-Li | 41 | 0px |
| Lei-Lei | 41 | 0px |
| Felicia | 41 | 0px |
| Ibuki | 41 | 0px |
| Dan | 41 | 0px |
| Sakura | 40 | 1px |
| Gouki | 38 | - |
Dizzy[edit]
| Character | Dizzy |
|---|---|
| Zangief | 50 |
| Lei-Lei | 45 |
| Ryu | 40 |
| Ken | 40 |
| Chun-Li | 40 |
| Sakura | 40 |
| Morrigan | 40 |
| Ibuki | 40 |
| Felicia | 35 |
| Tabasa | 35 |
| Dan | 35 |
| Gouki | 30 |
How to play (old version, redoing)[edit]
Controls
![]() = Punch
= Punch
![]() = Kick
= Kick
![]() = Special
= Special
- (See: Guard Crush, Easy Inputs)
![]() = Taunt
= Taunt
![]() +
+ ![]() = Throw
= Throw
![]() +
+ ![]() = Air Throw
= Air Throw
![]() +
+ ![]() = Bubble Toss
= Bubble Toss
- (The trajectory can be changed depending on the direction held)
- (Down inputs will place it on the ground or roll it forward, with it detonating after a short time)
- (Special cancel window starts before contact with opponent)
![]() +
+ ![]() +
+ ![]() = Mega Crush
= Mega Crush
- (See: Mega Crush/Counter Crush)
![]() +
+ ![]() = Air Tech
= Air Tech
- (Input when you are in a Launch state to escape fake combos and land on your feet)
- (Not always a good option. Pay close attention to your opponent's offense)
- (The trajectory can be changed depending on the direction held)
![]() = Block
= Block
![]() = Low Block
= Low Block
(![]() )
) ![]() or
or ![]() or
or ![]() = Air block
= Air block
- (Air blockstun can be cancelled with normals; advantage-on-block moves become punishable)
- (Grounded normals are air unblockable)
![]() or
or ![]() or
or ![]() = Jump
= Jump
- (6F:


 )
) - (7F:


 )
) - (8F:
 )
)
![]()
![]() = Super Jump
= Super Jump
- (7F: )
- (9F: )
- (11F: )
![]()
![]() = Dash
= Dash
![]()
![]() = Backdash
= Backdash
![]()
![]() +
+ ![]() = Dash Attack P
= Dash Attack P
- (Low: )
- (Crouch Crossup: )
- (Fake Overhead: )
- (Whiff on crouching: )
![]()
![]() +
+ ![]() = Dash Attack K
= Dash Attack K
- (Overhead: )
- (Low: )
- (Crouch Crossup: )
- (Whiff on crouching: )
![]() +
+ ![]() = Low P
= Low P
- (Despite appearances, this move will always need to be blocked low)
- (This move can be special cancelled by every character in the game)
- (Can be useful for challenging pressure and punishing negative moves)
- (Multi-hit: )
![]() +
+ ![]() = Low K
= Low K
- (Special Cancel: )
- (Knockdown: )
- (Multi-hit: )
![]() +
+ ![]() = Launcher
= Launcher
- (Launch State on Counter-Hit only)
- (Special Cancel: )
![]() +
+ ![]() = Sweep
= Sweep
- (: Same as
 +
+  )
)
![]() +
+ ![]() or
or ![]() = Pursuit
= Pursuit
- (Input when the opponent is in a knockdown state)
Guard Crush
![]() = Red gem Guard Crush
= Red gem Guard Crush
![]() +
+ ![]() = Yellow gem Guard Crush
= Yellow gem Guard Crush
![]() +
+ ![]() = Blue gem Guard Crush
= Blue gem Guard Crush
- (Each Guard Crush can be charged to do more damage and steal more gems on hit by holding the button
![]() +
+ ![]() = Guard Crush counter
= Guard Crush counter
- (Can only counter Guard Crushes. Counter window is while flashing blue, then has a whiff animation.)

File history
Click on a date/time to view the file as it appeared at that time.
| Date/Time | Thumbnail | Dimensions | User | Comment | |
|---|---|---|---|---|---|
| current | 04:12, 6 March 2022 | 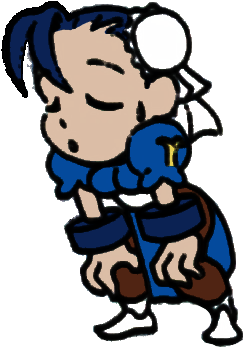 | 245 × 349 (78 KB) | 4a4a (talk | contribs) | File uploaded with MsUpload |
You cannot overwrite this file.
File usage
There are no pages that use this file.